
How to Deposit
Step 0: Check appropriateness
Be sure that your submission corresponds to our Mission Statement. Clear any copyright with rights owners. We do not accept datasets containing identifying personal data; when in doubt, contact SIKT. Read the Deposit Item Lifecycle.
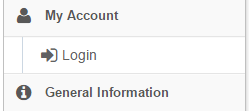
Step 1: Login
To start a new submission you have to login first. Click Login under My Account in the right menu panel.
Step 2: Starting a new submission
Now you have a new menu item 'Submissions' under My Account. Click on Submissions to go to the Submissions screen.
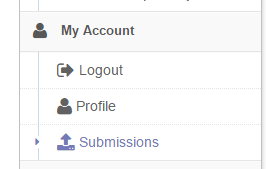
Now you should be on the main Submission and Workflow tasks page where you can view your incomplete/archive submissions. Click on the 'Start another submission' link to start a new Submission.

Step 3: Select type of your submission
You have initiated a new workflow item. In the next five steps you will provide the details about the item and upload content files. First select the type of the resource you are about to submit.
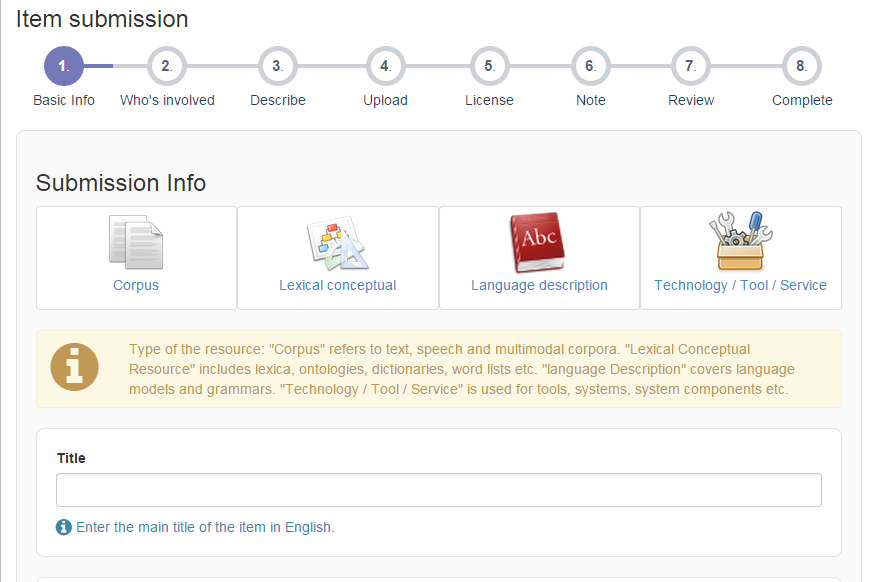
Click on one of the type buttons e.g. Corpus, when it is highlighted click Next.
Step 4: Describe your item
In this step you will describe your item.
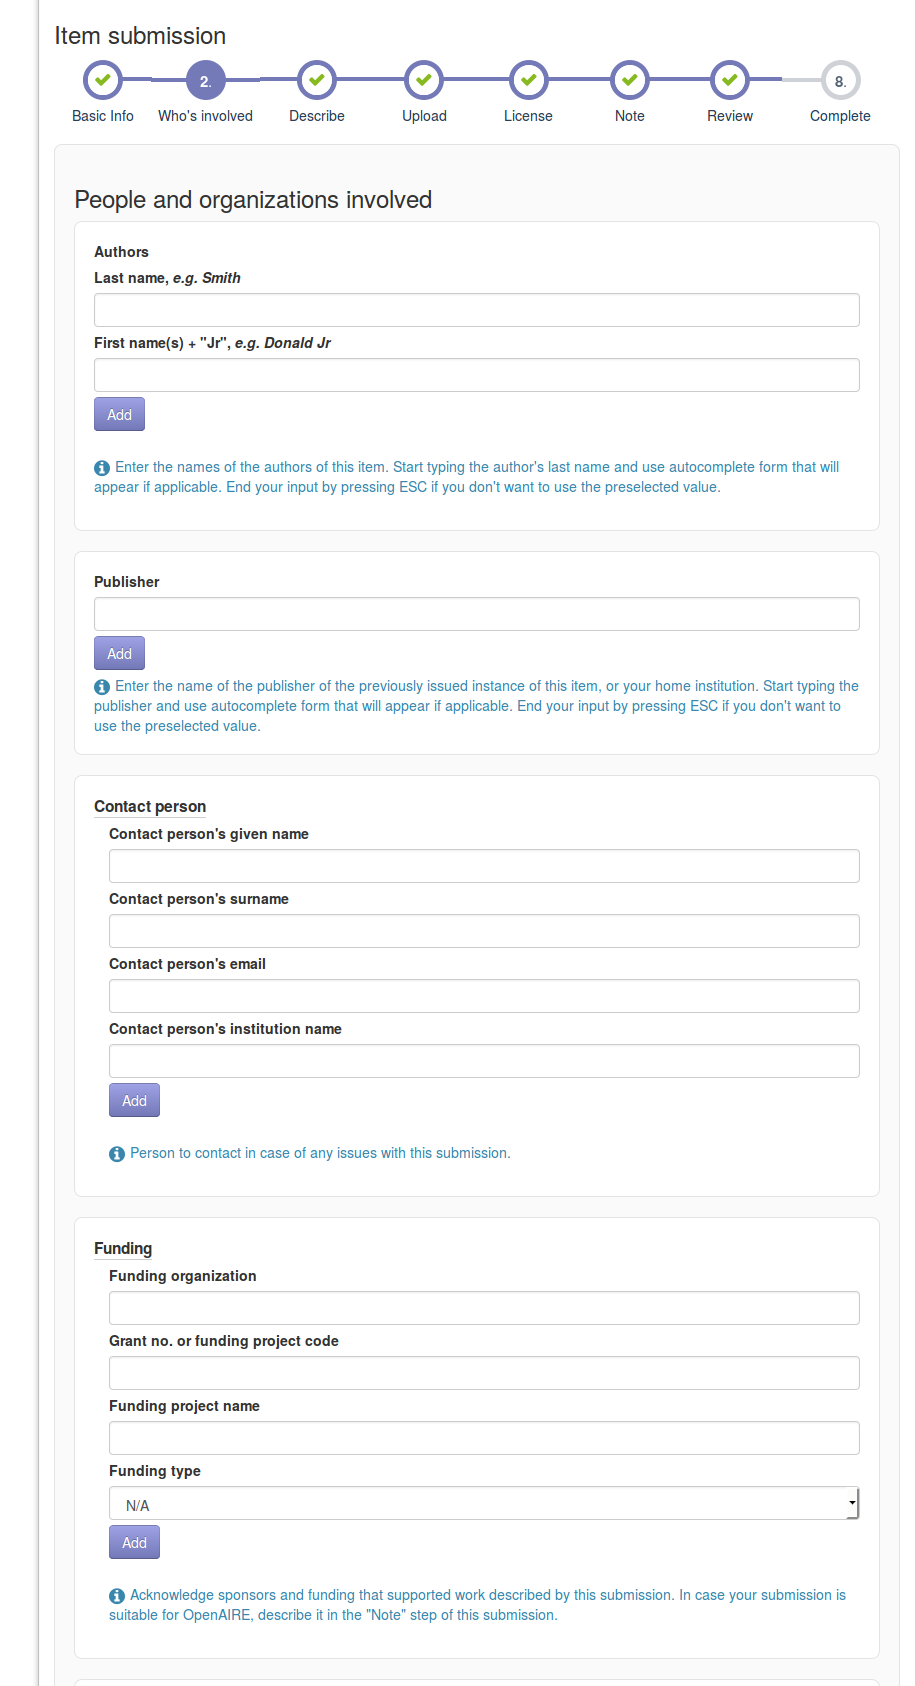
Once you filled the necessary information, click Next to upload the content files.
Step 5: Upload files
In this step you will upload the content files of your submission. If there are no files, you can skip this step by clicking Next. The files can be added by clicking the browse button or you can drag and drop files in the gray area with text 'Drag and Drop file(s) here'.
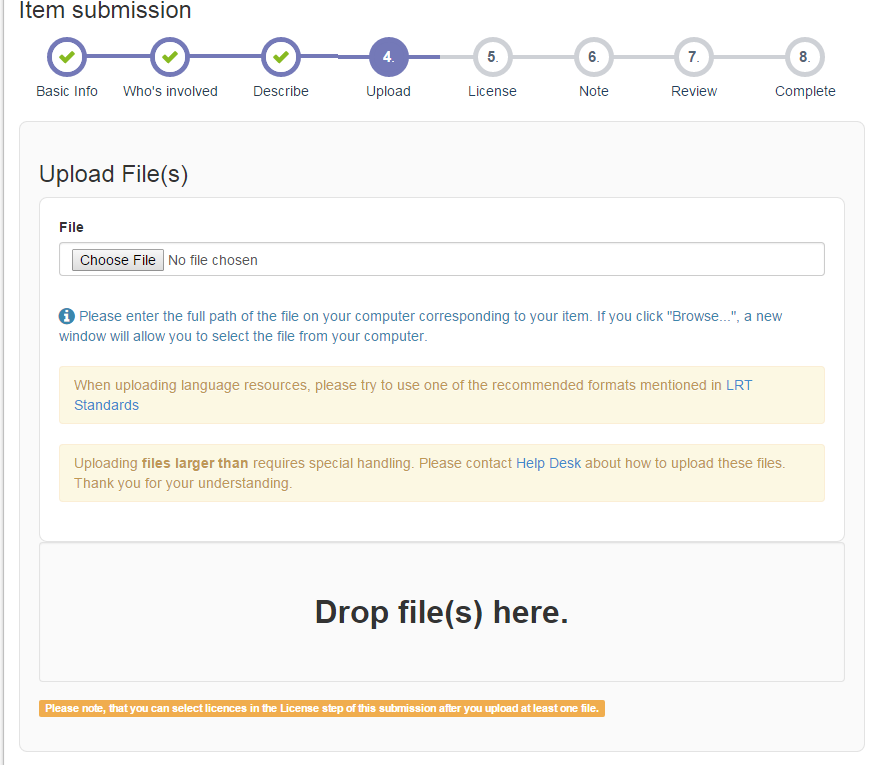
Selecting files will open a dialog box, where you can enter the description of each file. To begin the file upload click 'Start Upload'.
Once the file(s) upload is done, press OK to close the dialog box. You can add more files or delete/modify the already uploaded ones, after you finish press Next to continue with the License selection.
Step 6: Select Licenses
If you uploaded at least one file, you can select a licence under which you want your resources to be distributed in this step. Please read the distribution agreement carefully and check the 'I Grant the License' checkbox. Select the appropriate license from the dropdown list, you can read more about the licenes by clicking the link 'See more details for the licenses'. If none of the licenses suits your needs, please contact us.

Click Next to continue.
Step 7: More data
In this step you will provide extra information about your submission that will be helpful for better managing and identifying your record by other digital repositories.
Step 8: Review your submission
In this step you will review your submission before submitting it. Review page contains a sub-review panel for each of the step you have filled in before. If you want to change any field in a particular step just click Correct one of these and it will take you directly to the particular step page. Once you verify all the detail, submission can be made by clicking Complete Submission or you can click Save & Exit to save the submission for continue working on it later.
Step 9: Submit
Once you click the Complete Submission in the review step, item will be submitted for the reviewing by the editors. Once the editors approve the item it will appear in the repository. In case of any query regarding the submission, editors will contact you for the further detail.